This past week at work we had an application go down. The owner of that application rushed over to me and said the database server was down. I logged into the database server and verified that SQL Server service was up and running. To further allay his concern that the database server was blocking his application from making connections, I logged into the application server and quickly created a UDL file to verify the connection. Below is a step-by-step on how I did that so you can use it in case you run into a similar situation where you have to verify if a server can make a successful connection to a SQL Server database server.
How to Test Connection to SQL Server
You can watch how I do it here, or keep reading below:
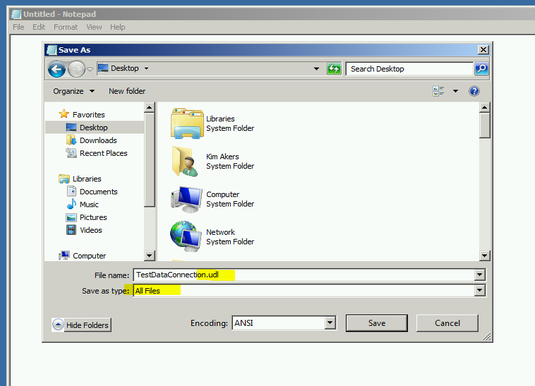
First, create a blank text file using Notepad and save it as whatever name you want with a “.udl” extension. I used “DataConnectionTest.udl.” Now make sure to click on the drop down and choose “All Files” instead of “.txt” (see snapshot below)

After saving it as a “.udl” you will see this icon (see screenshot below):
![]()
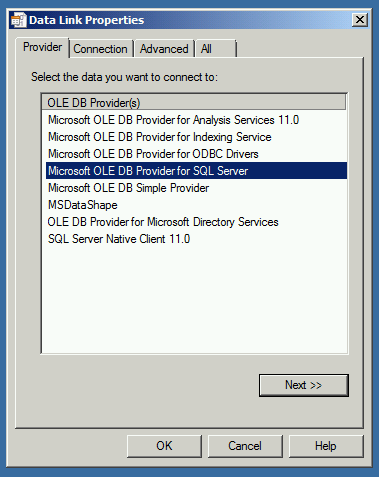
Double-click the icon and the main UDL window will open. Click on the Provider tab and choose “Microsoft OLE DB Provider for SQL Server.”

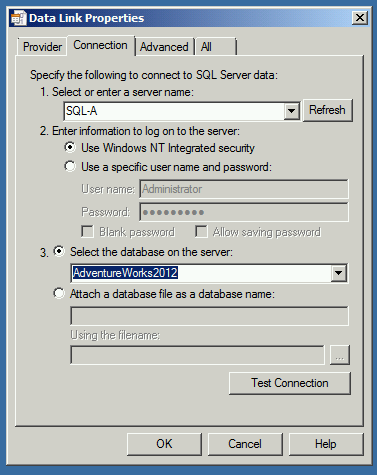
Click Next, OR click on the “Connection” tab

For “1. Select or enter a server name:” type out the sql server database server name. To save time, I would type out the server name instead of clicking the drop down option.
For “2. Enter information to log on to the server:” choose whichever option you need. In my example I chose Windows NT Integration security
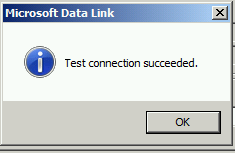
At this point, you can click on the “Test Connection” button, or click the drop down under #3 and choose what database you want to connection to. Once you click on “Test Connection” you should see the “Test connection succeeded.” pop box.

This is a very quick and easy way to verify connection to a SQL Server database without any special tools or software.