Everyone is talking about Linux. SQL on Linux? Wow! I think it’s about time I start to dive into it. If you’re like me, then the only thing you know about Linux is that you know it’s an OS. That’s it. I have never installed/configured it let alone installing/configuring an app on it.
Then came along SQL Server 2017 (and now 2019), and the ability to run it on Linux. That was really eye-opening to me. Microsoft definitely loves Linux!

This post will go into how to install Linux (CentOS) and SQL Server 2019.
My Setup
- Mac Mini (2018) – 32 GB RAM, 500 SSD (doesn’t really matter for the sake of this post)
- VMware Fusion (11.0.2) – You can use Oracle Virtual Box, Hyper-V, it doesn’t really matter
How To Install SQL Server 2019 on Linux
First, I download the CentOS 7.6 iso file.
Note: You have two options, either the “Minimal” ISO, or the “DVD” (full version) ISO. Download links are: Minimal and DVD
Once you got the ISO file download, I open up VMware Fusion and start the process of creating a new VM.
Now, *if* you are using VMware Fusion, then I click on the “+” download and click “New” then get the Select the Installation Method screen below:
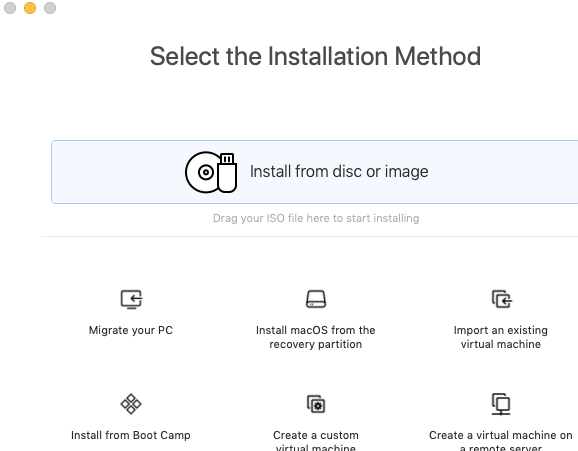
Click the big option up top, “Install from disc or image” and then find your CentOS iso.
Then I just go with the default setting for “Choose Firmware Type” and keep “Legacy BIOS” checked, click Continue
Right before I click Finish, I click “Customize Settings.” It prompts you to save the file, I just leave it as the default (mine is CentOS 7 64-bit.vmwarevm) and click Save.
After the file is saved, the Settings window pops up as seen below:
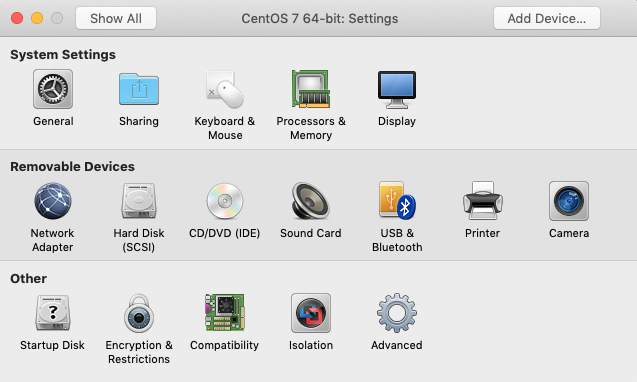
Open “Processors & Memory” and choose 4 GB of RAM and 2 processor cores.
Note: SQL Server needs minimum of 2 GB of RAM to even install.
If you want to add more disk space, click on Hard Disk and choose it. I left mine at the default of 20 GB.
So now that you have all that configured, click the “PLAY” button in the middle of the VM window. (This might be different for you, depending on what VM tool you are using)
This will initiate the CentOS process.
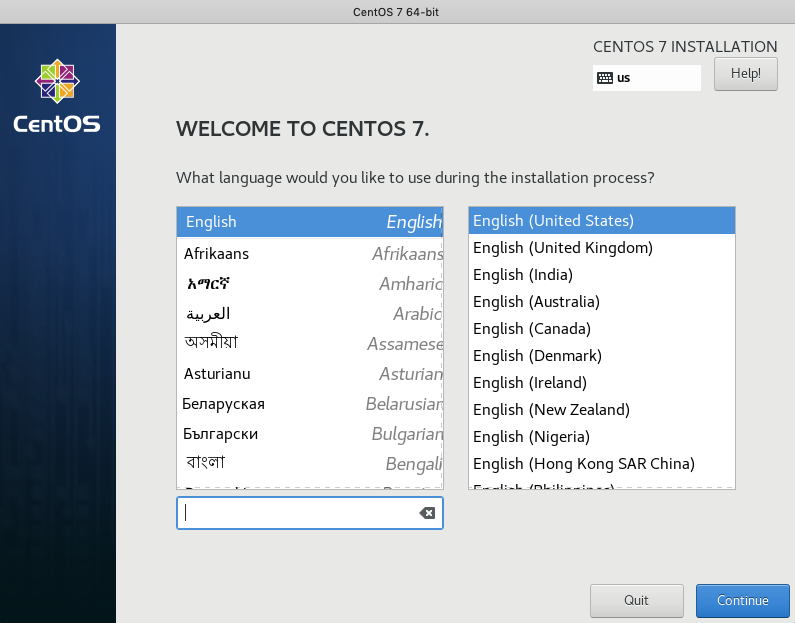
The first main “gui” screen that pops up is where you choose your language. Choose whatever language and click the blue Continue button.
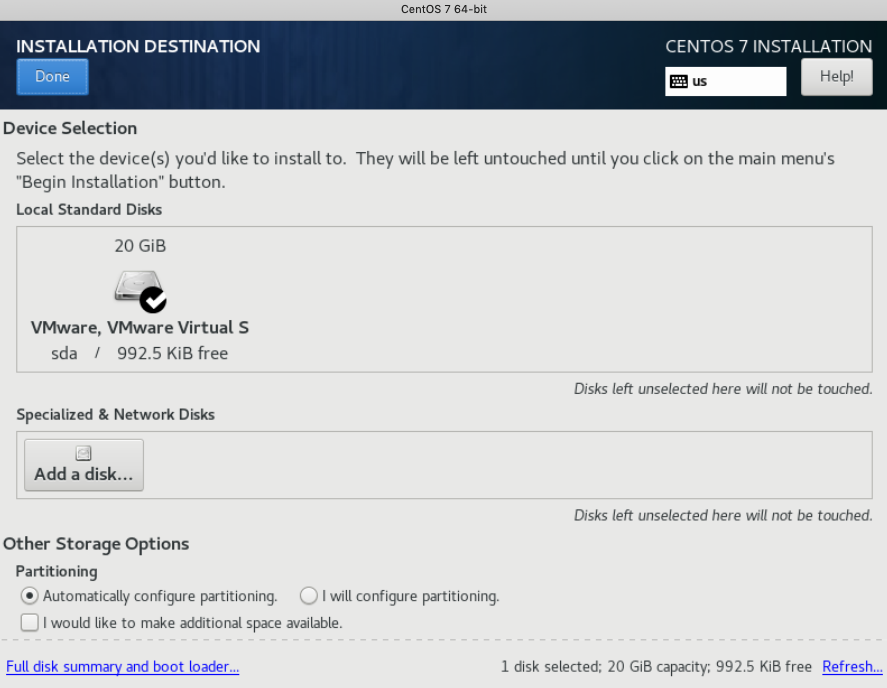
On the next screen, you will see the “INSTALLATION SUMMARY.” Scroll down to “INSTALLATION DESTINATION” and click on that icon. That will bring up the below window. Just confirm the drive that you will be installing CentOS and click the blue Done button on the upper left hand side.
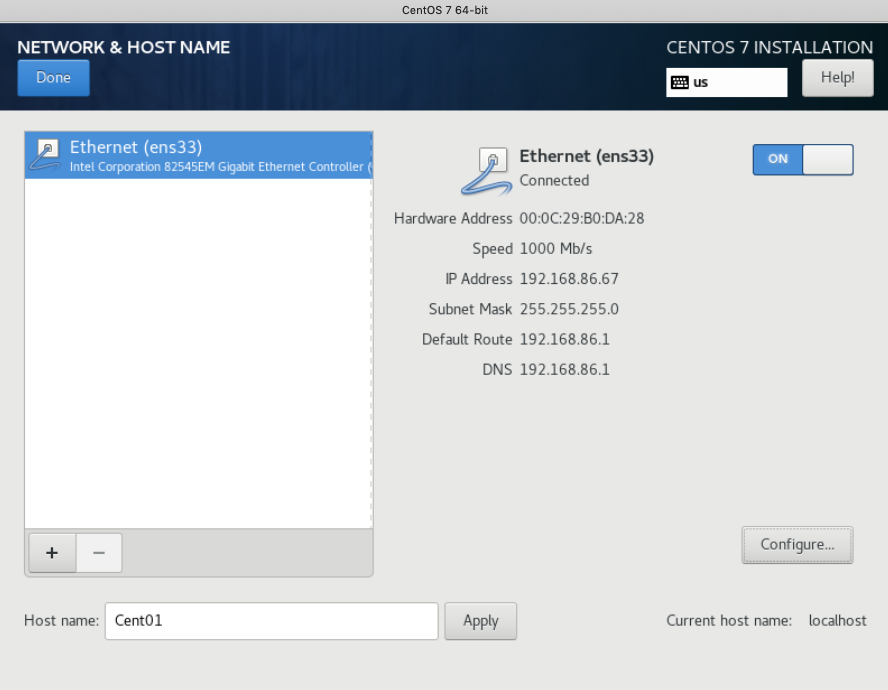
This will take you back to the main Installation Summary page. I click on the Network & Host Name icon. This is where I turn on my Ethernet connection (see the blue ON) and change my host name (default is localhost) to Cent01. You can name your hostname whatever you wish. See below:
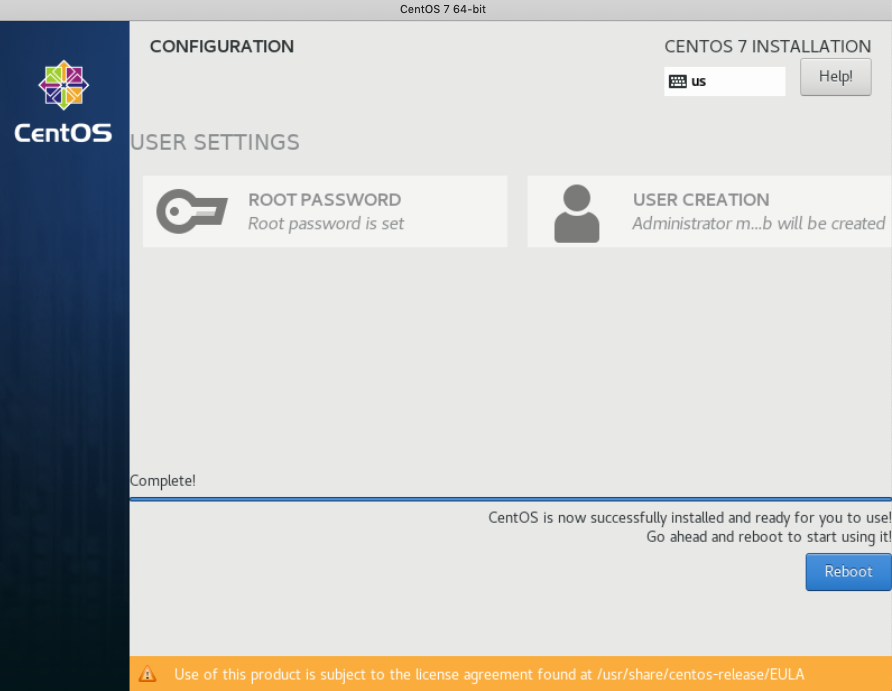
I then click the blue Done button on the upper left hand side and go back to the main Installation Summary page, then click the blue Begin Installation blue button. The next screen is the Configuration screen. You will see the progress bar going, but there are two things I do here. Creating a ROOT password and creating a USER.
For the sake of this post, I just keep the same password for both Root and User, and I choose to make the User an “administrator.” Then click the blue Done button and it takes you back to the installation / configuration window.
After the install is complete, you have to click the blue Reboot button on the lower right hand side as shown below:
After the reboot, you are bought to the wonderful, colorful login screen:
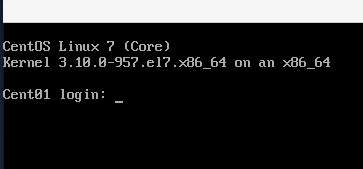
Enter in the user/password you created during installation and log in.
The first thing I do is update all the stuff (I have no idea what all this stuff is, but it’s best to update them. I’m still learning).
Type sudo yum update and hit enter (if you’re prompted , type ‘y’ and Enter).
You’ll see a bunch of stuff happening (packages being downloaded/installed), just be patient and wait until you are taken back to the prompt.
Now we can start installing and configuring SQL Server 2019.
At the command prompt type out the below and hit Enter (This will download the SQL Server 2019 repository configuration file):
sudo curl -o /etc/yum.repos.d/mssql-server.repo https://packages.microsoft.com/config/rhel/7/mssql-server-preview.repo
Next, type out the below and hit Enter (this will start the installation process):
sudo yum install -y mssql-server
After the above install is complete, you are ready to run the SLQ Server setup that allows you to setup the SA password and choose your Edition. Type the below and hit Enter:
sudo /opt/mssql/bin/mssql-conf setup
The first option is to enter your Edition (I choose Developer Edition #2) and hit Enter.
The next question is “do you accept the license terms”, Type “Y” and hit Enter.
The next question is to type out your SA password. Type it out and hit Enter.
Done.
You have successfully installed SQL Server 2019 on your CentOS VM.
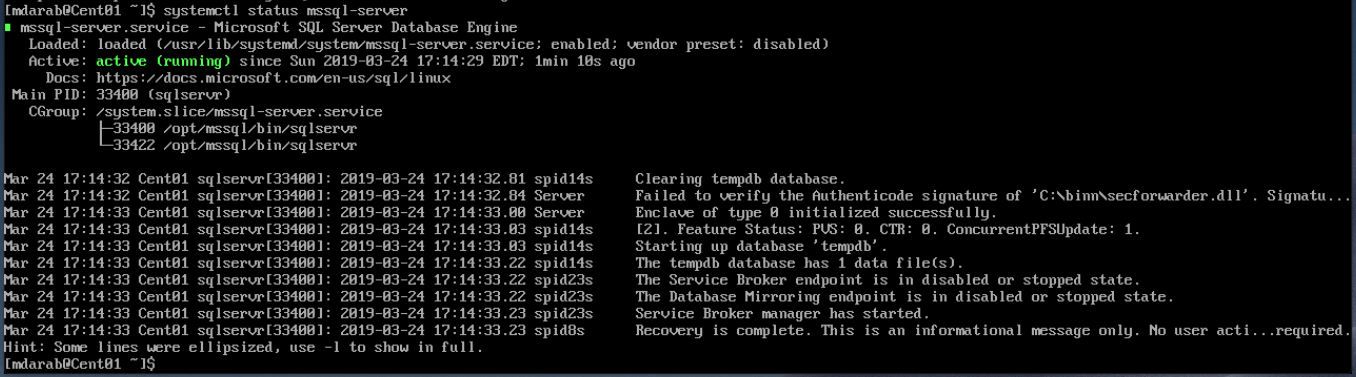
Now let’s verify that SQL Server is up and running. We type out the below and hit Enter:
systemctl status mssql-server
You should see something similar to the below screenshot with a green “active (running)”:
Now, even though SQL Server is running on your Linux CentOS VM, you might not be able to make remote connections due to firewall rules. Let’s open up TCP port 1433 by running the below command:
sudo firewall-cmd –zone=public –add-port=1433/tcp –permanent
Then reload the firewall by running this command and hitting Enter:
sudo firewall-cmd –reload
If for some reason you cannot ping your CentOS VM from the other machine, make sure that the NIC on your CentOS is up. I am still learning, so not quite sure but for some reason I had to manually set my CentOS VM’s NIC to “up” so that it can “turn on.” To see if your NIC is up, run the following command:
nmcli conn show
This will list all your NICs. I just have one, and it’s called, “ens33.” Now type the following command to bring the NIC “up.”
nmcli conn up ens33 [replace ens33 with whatever your NIC name is]
After I ran that command, I could make remote PINGs and connect to SQL Server.
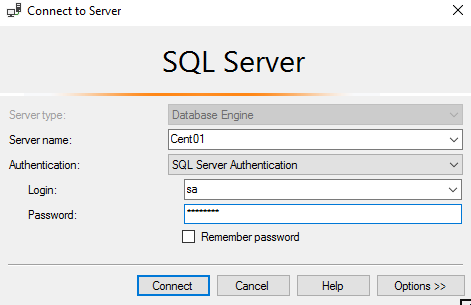
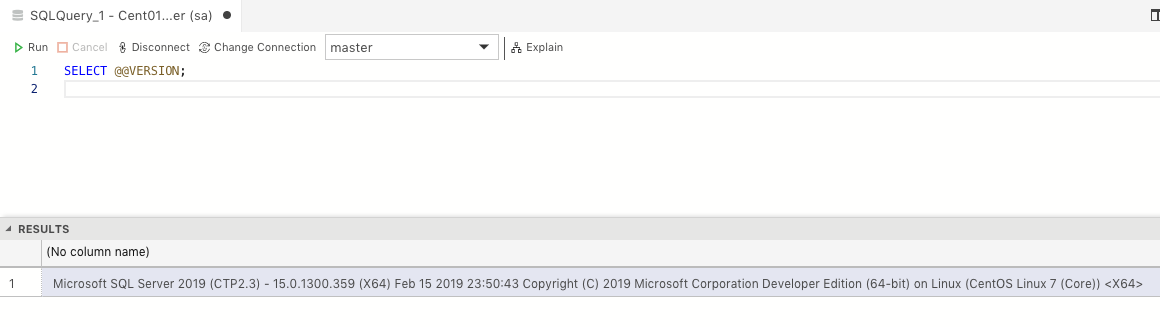
Now I will connect from a Windows Server 2016 VM using SSMS:

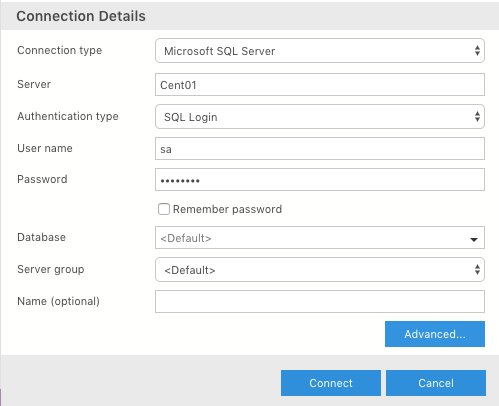
I also connected via Azure Data Studio from my Mac Mini:
So there you have it! A “quick” way to install SQL Server 2019 on CentOS VM.
One Reply to “How To Install SQL Server 2019 on Linux (CentOS)”