Yesterday was the release of SQL Server 2019 CTP 3.2. The biggest change in CTP 3.2 is that Big Data Clusters is now in public preview. That means anyone can go download and deploy it. Prior to CTP 3.2, you had to sign up for the “Early Adoption Program”, wait until you received an email with your Docker credentials, etc. With CTP 3.2, Microsoft has actually done away with Docker credentials. You no longer need that to create your Big Data Cluster as the images needed are on Microsoft’s public repo.
I’ve been “playing around” with Big Data Clusters for some time now and CTP 3.2 is way ahead when it comes to streamlining the BDC deployment process. You can check out my 4-part series on deploying BDC on AKS to see how cumbersome the process used to be. New in CTP 3.2, you can deploy a BDC on AKS (an existing cluster OR a new cluster) using an Azure Data Studio notebook. Let’s see how.
Just for background, I am running on my Windows 10 Pro Surface Book 2. You will need to install the following:
- Latest version of Azure Data Studio (Insiders build) Download
- SQL Server 2019 preview extension installed in Azure Data Studio
- You need to install azdata, kubectl and Azure CLI (check here for install help)
Once you have the above installed, go ahead and launch Azure Data Studio (Insiders Build). To the right of the CONNECTIONS tab, you will see the ellipses. Click it and you will see two options:
- Deploy SQL Server big data cluster
- Deploy SQL Server on Docker
Choose the first option. This will bring you to the following screen:
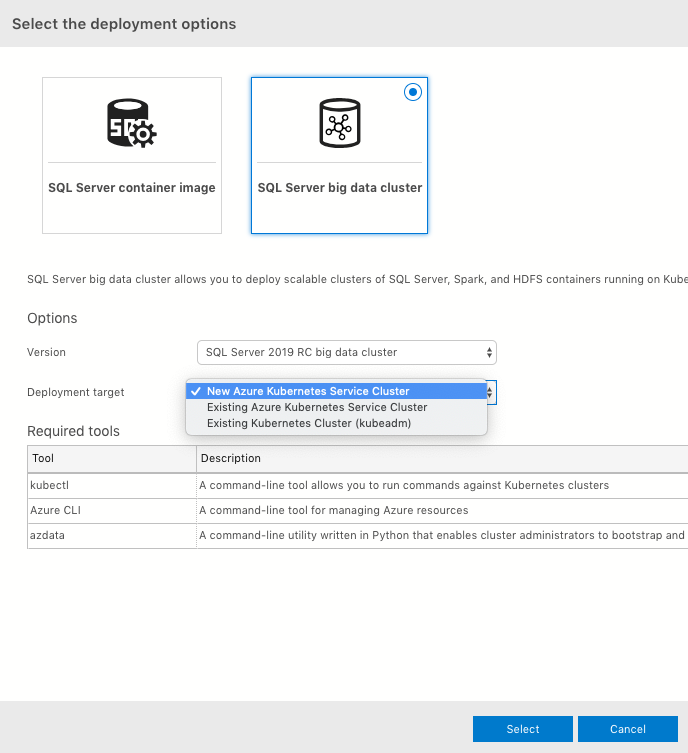
For “Deployment target” you see an option to create a new AKS cluster, use an existing one, or an existing Kubernetes cluster (kubeadm). This last option is if you have deployed a K8s cluster on-prem) Go ahead and select “New Azure Kubernetes Service Cluster” and click “Select”. The next window is the “Deployment target: new AKS cluster” pane (see screenshot below). You can change a lot of the fields here. Personally, for testing purposes, I make sure the VM Count is set to 1. The default is 5. I choose 1 VM because of the cost :)

After you fill out all the pertinent fields, click “Open Notebook.”
The notebook might look overwhelming at first (especially for someone who’s new to BDCs and/or notebooks) but I will explain all the cells.
Let’s start at the top. You see the title and 3 bullet points as shown in the below screenshot:
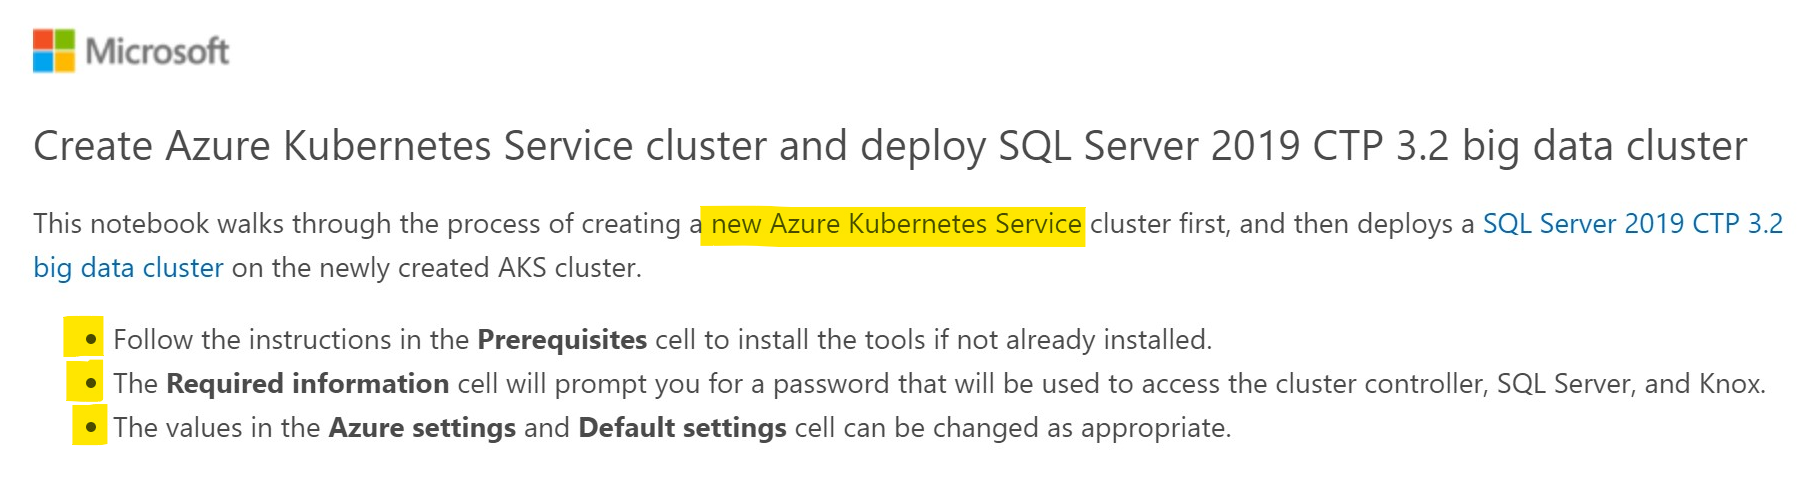
This is pretty straight forward stuff. It’s telling you that this notebook will create a brand new AKS cluster and then deploy the Big Data Cluster on top of that AKS cluster. The three highlighted bullet points provide more information:
Under the Prerequisites cell (below) make sure those tools are installed (also mentioned at the beginning of this post). The Required information cell will ask for a password that will be used to access the cluster controller, SQL Server master instance and Knox (so don’t forget this :) Lastly, the Azure settings and Default settings can be modified (as you will see later in this post.
Let’s continue with the Prerequisites cell as shown below:
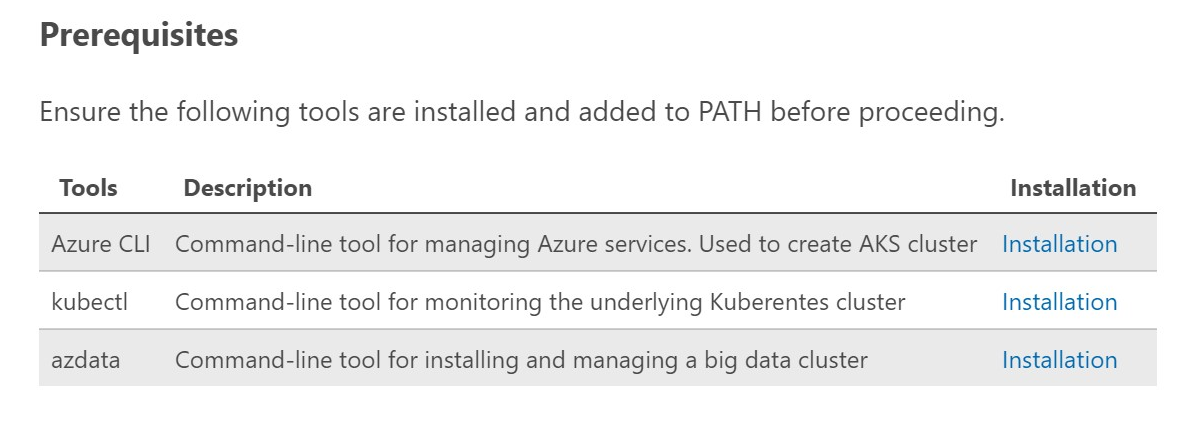 If you do not have any of these tools (or not sure), you can click on the Installation link and follow the instructions to install them. I also highly suggest you keep your tools updated.
Next is the Check dependencies cell. When you run this cell, it will check the versions of AZ CLI, Kubernetes, and azdata (you can see the code in the screenshot below):

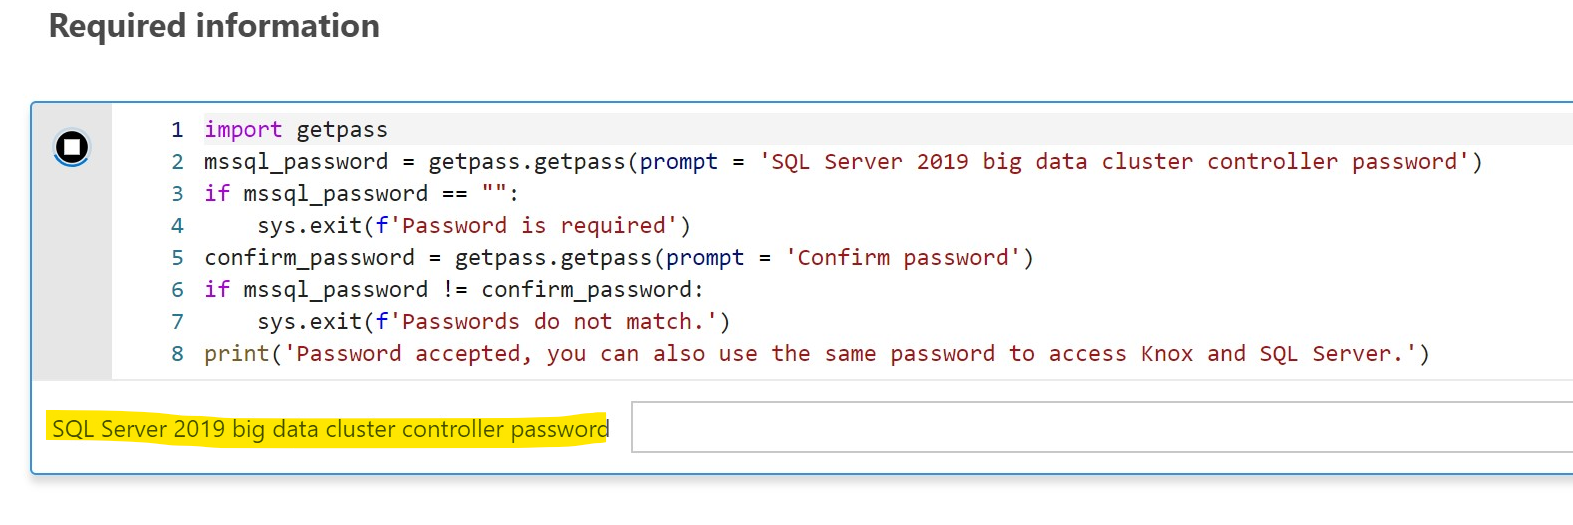
Next is the Required information cell (image below). When you run this cell you will be prompted to enter in a password for the controller (which you can also use for logging into SQL Server master instance) **The default username is: admin**
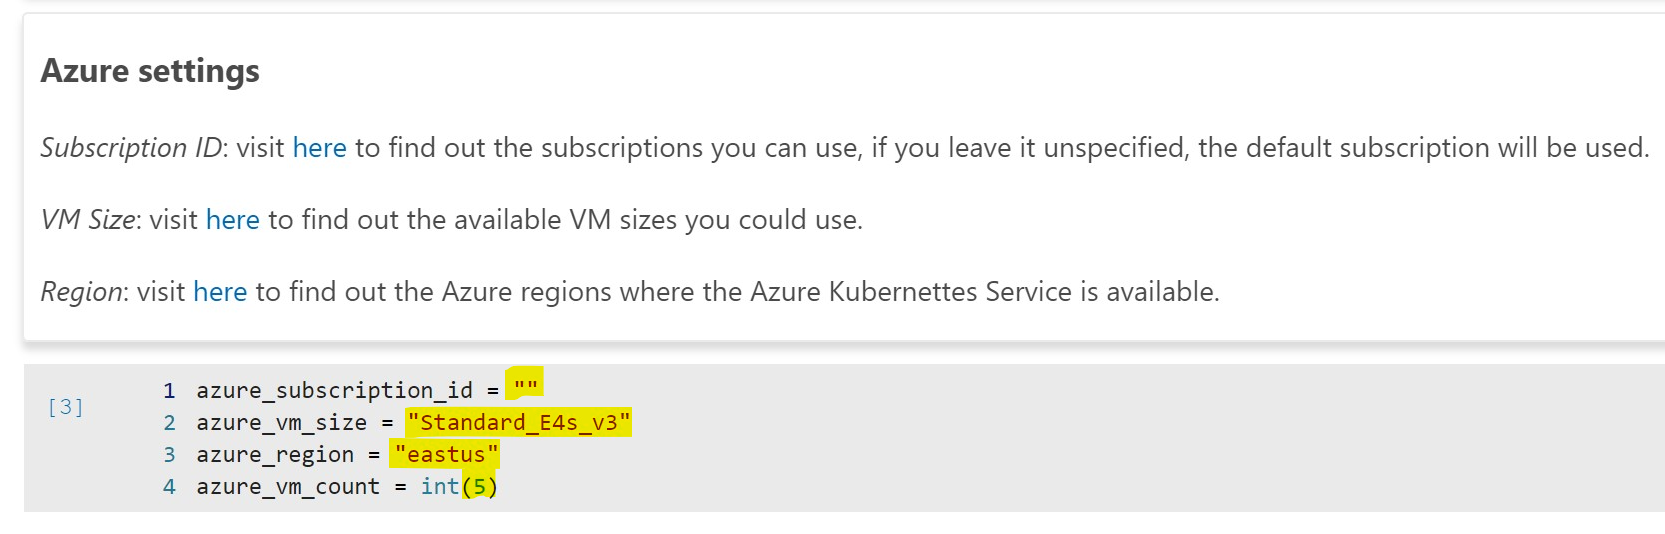
Next cell is Azure settings. When you run this cell it will setup all the parameters needed to create the AKS cluster. You’ll need your Azure Subscription ID, a VM size, region and VM count. You can modify these settings however you wish. My suggestion, especially if you are just playing around with BDCs, is to set the azure_vm_count = int(1). You can deploy the entire BDC on a single VM. No need to incur extra cost for 5 VMs. See screenshot below:
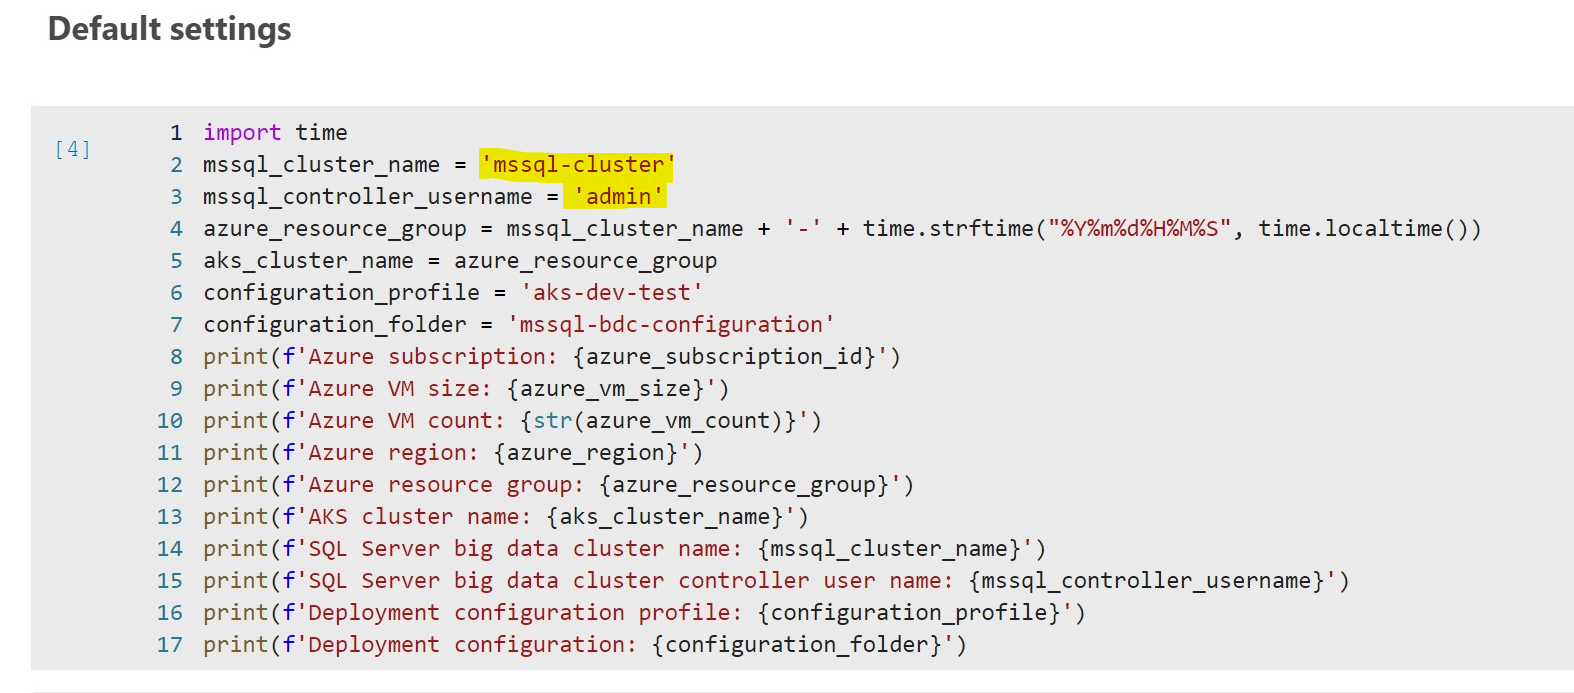
The next cell is the Default settings. If you don’t specify a cluster name, the default one is: mssql-cluster. You can name this whatever you want, or leave it alone. See image below:
 The next two cells, Login to Azure and Set active Azure subscription are there so you log into Azure. Make sure when you run the Login to Azure cell to enable the login via web browser.
After doing all the above, it’s time to create the Azure resource group that and the AKS cluster that will be under that resource group. This will take some time so be patient. See image below:

Once the AKS cluster is created, you’re ready to run the Set the new AKS cluster as current context cell. This is extremely important to execute successfully. If it does not execute successfully the BDC will not deploy correctly. Per Kubernetes, this is the definition of what a “context” is:
A context is a group of access parameters. Each context contains a Kubernetes cluster, a user, and a namespace. The current context is the cluster that is currently the default for kubectl : all kubectl commands run against that cluster. (link)
The next cell is the Create a deployment configuration file. This is straight forward as it sets the EULA to yes, and a couple other parameters to get ready for the next operation.
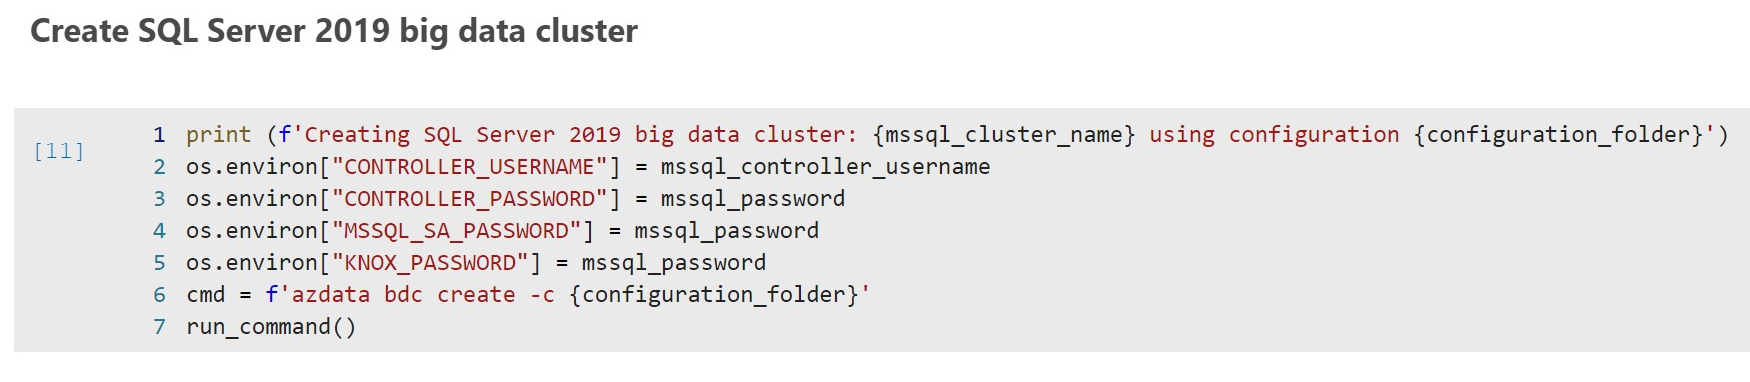
Time to deploy the actual Big Data Cluster! This cell is called, Create SQL Server 2019 big data cluster, and will take some time when you run it. So be patient. As you can see in the image below, it sets all the passwords for the controller, SQL master instance and Knox.
The next cell is Show SQL Server 2019 big data cluster endpoints. Once the cluster build is successful above, you run this cell to display all the endpoints.
The final cell is Connect to master SQL Server instance in Azure Data Studio. You can click this cell and it will generate a hyperlink for you to click. Once you click it, ADS will automatically log into the BDC’s SQL Server master instance. From there you can peruse your newly created Big Data Cluster. Enjoy!
Note: When you X out of the tab in ADS, it will prompt you to save the notebook. I tried saving it to my desktop, but for some reason the notebook did not work when I opened ADS and did a “open file.” So the best bet is to not save the notebook, and any time you want to deploy a BDC, just do it via the steps mentioned in this post since the notebook is already part of ADS.
3 Replies to “Deploy SQL Server Big Data Cluster Using Azure Data Studio Notebook”